 When one thinks of natural maple syrup, Vermont is likely the first place that comes to mind. The state did produce 2.5 million gallons of it last year, half of the overall production in the United States. And, while NJ doesn’t contribute largely to that maple syrup industry, you might be surprised to learn it is home to many varieties of maple trees including the Sugar Maple – the best source for sap that turns into delicious maple syrup. You might even be more shocked to realize this resource could be sitting right in your backyard.
“We’re lucky we’re in an area in the right climate, and with a high enough density of maple trees, it’s possible for us to make maple syrup,” explains Kevin Watson, Assistant Director of Howell Living History Farm, a facility of the Mercer County Park Commission. “The ingredients you need climate-wise to make for good maple sugaring are freezing temperatures at night and thawing temperatures during day. In non-maple trees, inside the xylem of the tree is just water. In maple trees it’s a gas, so the temperature fluctuations result in cold temperatures creating a frost on the inside of the cells and the evaporation of the liquid resulting in movement of the sap through the tree up and down.”
FINDING THE RIGHT TREE
With these requirements, February is the perfect time to try and drain the sap from your trees and turn it into a sweet treat. To determine if you’re living amongst the right species of trees, you first must do a little detective work. The bark, branches and buds will tell you right away if a Sugar Maple is in your yard.
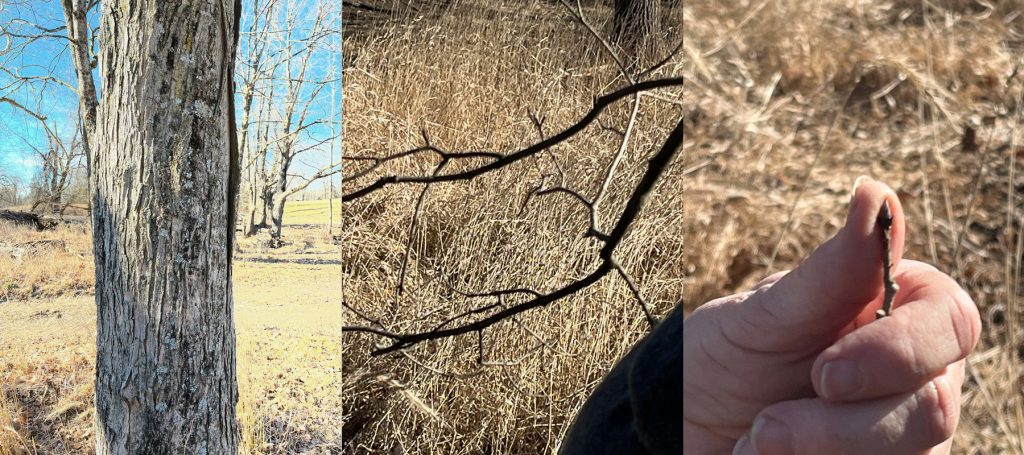
The bark should be a medium to dark grey color, the branches will have opposite positioning as opposed to alternate and the buds tend to be black with a red hue. In addition, its leaves (if they’re still around) usually have five lobes and will resemble the shape of what you find on the Canadian flag. With the highest concentration of sugar of all maples, the Sugar Maples has about 6% sugar content in its sap.
“There are 13 North American maple species that can be tapped for syrup. Ideally Sugar Maples and Black Maples have highest the concentration, but you can tap Red, Silver, Swamp and Norway Maples as well. For a Norway Maple, you need 90 gallons of sap to make 1 gallon of syrup,” Watson shares.
Yet it takes just 40 gallons of sap from the Sugar Maple to create one gallon of syrup. A solid Sugar Maple is going to produce approximately one gallon of sap every 24 hours. That one gallon will then yield approximately 3-4 ounces of syrup. So, it is a lot of work to create a little sweetness, but many think it’s worth it!
REMOVING THE SAP
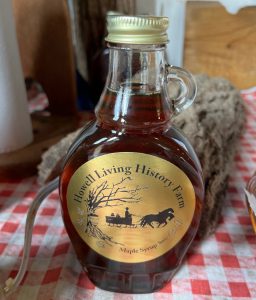 Howell Living History Farm aims to demonstrate life on the farm in the early 1900s, at a time when things were done manually using the natural resources around. For the past 30 years they have been tapping their Sugar Maples to demonstrate the process to locals (and ultimately bottling up the natural maple syrup.) So far this year their 800 gallons of sap have created 20 gallons of syrup which has been separated into 320 8-ounce bottles.
 There are three ways to collect sap from a tree, two of which are demonstrated at Howell Living History Farm: manual bucket collection and gravity feed method with a pipeline system. As you see in this photo, a section on Baldpate Mountain, adjacent to the historic farm, has been set up with blue pipe tubing, using the gravity down the mountain to pull the sap from the tap into a storage container that is collected daily. More commercial ventures today often use vacuum feed, which pulls that sap through the tubing even faster.
It is believed the first tree taps were created by the Native Americans, using hollowed out Elderberry, Cedar or Staghorn Sumac segments and scraping out the inner core. They then used hot rocks to heat up the collected sap inside their birch bark bowls to create what likely became maple sugar. Nowadays, metal taps, steel pots and other more commercial products are available.
“When you’re tapping a tree, you check to make sure it doesn’t already have any damage, maybe a branch had blown off and was leaking sap or a woodpecker made holes,” clarifies Watson. “Examine the tree to make sure it’s healthy. If so, and it’s at least 11-inches in diameter, you can put one tap in. If it’s 18-inches in diameter or more you can put in 2 taps, and 24-inches or over you can tap it 3 times.”
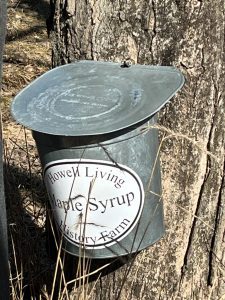
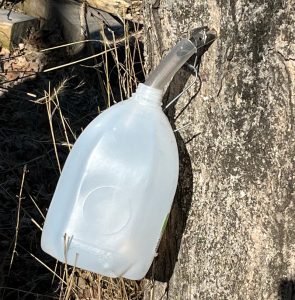
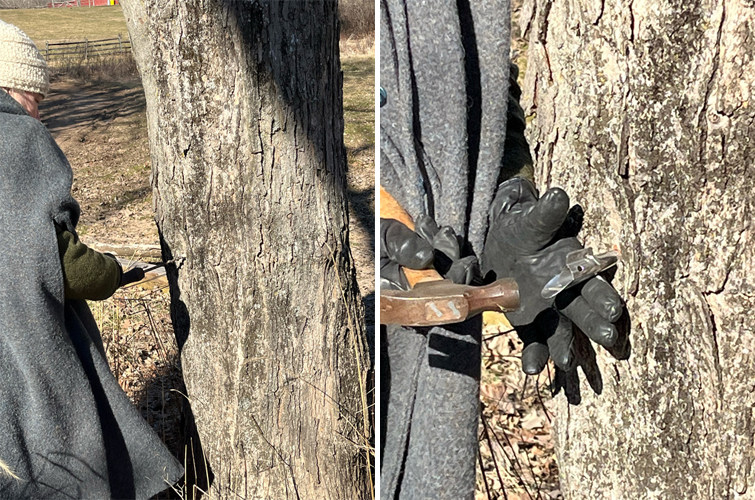 You will drill a hole using a 7/16” drill bit and then insert a metal tap, being careful to space it at least 2 inches from any previous scarring. You can choose to hang a metal bucket below it, like they did in the early 20th century, or you can simply attach a cleansed milk container to trap the sap. You’ll see, it comes out looking mostly like water, because sap is 98% water. It’s when you change its composition that the sugary traits heighten and take form.
TURINING IT INTO SYRUP
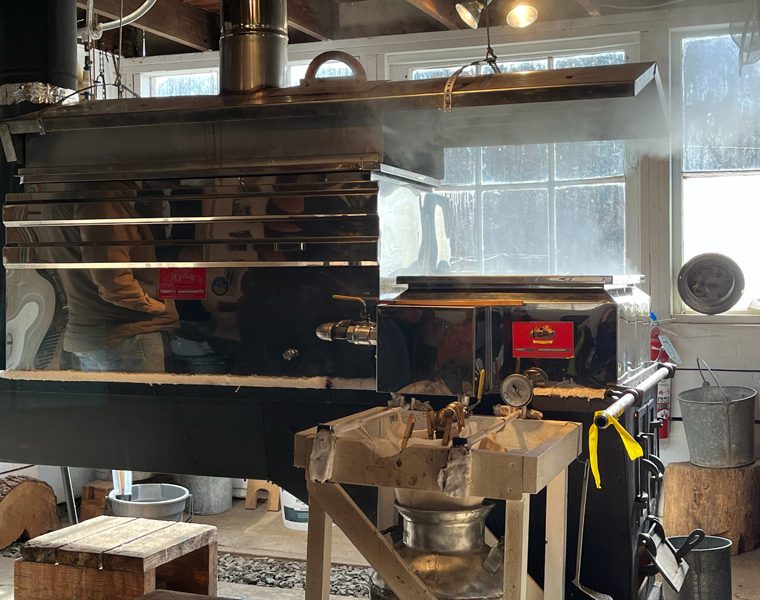 Once you’ve collected your sap, it must be boiled to change consistency and sweeten. At Howell Living History Farm, this used to be done manually with a cauldron. The farm has maintained the use of wood-burning energy but has upgraded its process and is now using a 30-gallon commercial evaporator. The goal is to ultimately heat the sap to 7.25° past the boiling point, or to 219.25°. That is when it becomes syrup. Should you choose, you can boil it up to 230° to create maple candy and at 260° maple sugar will form.
“An evaporator is essentially a big boiling kettle. To do it at home you need a big pot, a candy thermometer and plenty of time. Depending how much you’re making, it would take at least 4-6 hours of boiling time,” Watson says. “Once you get to the point that you’re noticing it has the beginnings of a golden color, you want to make sure you’re adding a little more sap if continuing to a roaring boil or, if it’s getting syrupier, take out your thermometer and find out what temperature you’re at.”
At home, you can set up a system outside using your grill or even a turkey fryer (if done inside you will end up with very sticky ceilings and walls). The safest way to set up this process is to create a two-pot system, so as the raw sap starts to boil you can transfer it to boil further in a 2nd pot with a little less heat, continue adding more raw sap to the first pot then transferring it again in the process using caution not to burn the sap. Once you’ve reached the required temperature, let it cool (to ideally 180 degrees to prevent mold or yeast growth). You can use coffee filters to drain it into air-tight containers to store or into any container kept in your refrigerator for immediate use.
 If this process feels a bit overwhelming, don’t worry. You can go to Howell Living History Farm for a free demonstration. Click here to register for one of multiple tours taking place on Saturdays February 18th and 25th. You can purchase a tap in their shop or elsewhere online, then at home locate any maple trees and set up your system to create homemade maple syrup. With all the hard work you put in, it will likely be the sweetest you’ve ever had!

Lisa Jacknow spent years working in national and local news in and around New York City before moving to Princeton. Working as both a TV producer and news reporter, Lisa came to this area to focus on the local news of Mercer County at WZBN-TV. In recent years, she got immersed in the Princeton community by serving leadership roles at local schools in addition to volunteering for other local non-profits. In her free time, Lisa loves to spend time with her family, play tennis, sing and play the piano. A graduate of the S. I. Newhouse School of Public Communications at Syracuse University, Lisa was raised just north of Boston, Massachusetts but has lived in the tri-state area since college. She is excited to be Editor and head writer for Princeton Perspectives!